When removing your processor, be very careful not to damage it! The most common way a processor is damaged is by the bending of the very soft pins on the legs. It is also important to know that many processors are "keyed" or in other words only fit one way. It is therefore very important not use force when inserting a new processor. It should just gently fall into its socket with minimal effort.
Once you have located the processor inside your computer, you will then need to remove the screws that hold the heat sync down, the heat sync uses a heat compound that is in many cases white or silver in color. It is not uncommon to see the processor stuck to the heat sync when the processor is removed. If the chip is attached, just gently pry it off with a flat head screw driver.
In order to identify what the upgrade chip is, you will need to clean off the heat compound from the surface of the chip. I personally like to use WD40, but you can pretty much use any cleaning method that does not corrode the chip. Once the chip is clean you will notice numbers printed on the surface of the chip. These numbers may read 1.6GHZ/256/400/1.75v. These numbers are also preceded by the manufacturer name and the serial number. In my particular case since I am upgrading to a faster CPU the one I am replacing it with is 2.1GHZ/256/400/1.75v. I simply remove the old chip, and put the new one in the place where the old one was. There is also a small lever arm hat must be lifted to the top to open the "Zif socket" and pushed completely down and snapped in place to lock the "zif socket."
 Once the chip is replaced, use some quality thermal heat compound like Arctic Silver, reattach the heat sink screw it down and then fire up the computer. If you get a picture on the screen you have done everything correctly. If you do not get a picture on the screen it is possible that you need to check the specs on you mother board for jumper configurations and chip speed compatibility.
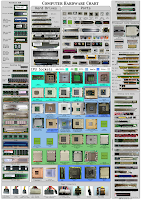
This jumper issue is an unlikely problem since most motherboard are "plug and play" making jumpers obsolete. If you are not certain of your socket type please double click the photo alongside this post and match it up.
For an instructional video see the one below embedded from YouTube.


No comments:
Post a Comment